Mastering Digital Atmosphere: A Guide to Cloud Procreate Brushes for iPad Artists
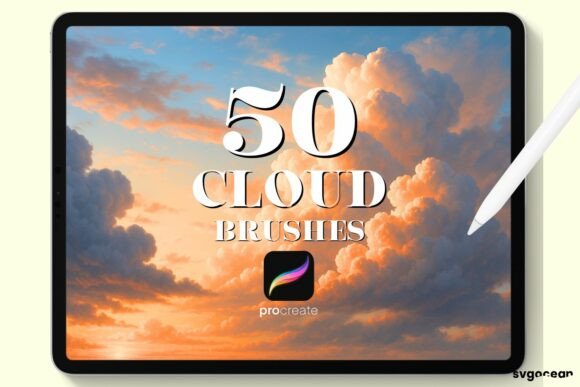
The evolution of digital illustration has transformed the way artists approach texture, depth, and environmental storytelling. Among the most challenging elements to render convincingly in a digital medium are atmospheric effects, particularly clouds. Whether you are creating sweeping fantasy landscapes, realistic cityscapes, or whimsical children’s book illustrations, the ability to paint convincing skies is a cornerstone skill. This is where specialized tools like Cloud Procreate Brushes become indispensable assets in your creative workflow. Designed specifically for the Procreate app on the iPad with an Apple Pencil, these tools bridge the gap between technical precision and artistic freedom.
Digital painting often suffers from a "flat" appearance when artists rely solely on standard round brushes to build complex organic shapes. Clouds, by their nature, are amorphous, layered, and constantly shifting. Replicating this complexity manually can be time-consuming and frustrating. Specialized brush sets address this by encoding specific textures, scattering patterns, and opacity behaviors into a single stamp. When used correctly, they allow creators to focus on composition and lighting rather than getting bogged down in the minutiae of individual puff formation. The result is a more dynamic, professional-looking piece that captures the ephemeral quality of the sky.
The Technical Advantage of Specialized Stamps
Understanding why dedicated cloud tools outperform generic brushes requires a look at how digital brushes function within the Procreate ecosystem. Standard brushes apply pigment in a uniform manner. In contrast, Cloud Procreate Brushes are engineered with custom grain sources and shape dynamics. These stamps are clean and easy to use, providing immediate visual feedback that mimics the soft edges and volumetric density of real cumulus, stratus, or cirrus formations.
One of the primary benefits of these tools is their versatility regarding color and opacity. Unlike pre-rendered PNG overlays that sit on top of your artwork as static images, these brushes interact with your canvas layers. You can paint them in any color, allowing for dramatic sunsets, stormy greys, or pastel dreamscapes without being locked into a single hue. Furthermore, adjusting the opacity allows for the creation of deep, multi-layered skies. By layering semi-transparent strokes, artists can build volume and depth, creating the illusion that some cloud formations are closer to the viewer while others recede into the distance. This level of control is essential for achieving a three-dimensional feel in a two-dimensional space.
Workflow Integration for Professionals and Hobbyists
For professional concept artists and illustrators, speed is often as critical as quality. Client deadlines demand efficient workflows, and manual cloud rendering can consume hours of production time. Integrating Cloud Procreate Brushes into your toolkit streamlines this process significantly. What might take thirty minutes to sketch and refine using traditional methods can be achieved in minutes with the right digital stamps. This efficiency does not come at the cost of quality; instead, it frees up mental energy for higher-level creative decisions, such as lighting direction, color harmony, and narrative focus.
Hobbyists and educators also find immense value in these tools. For beginners, the intimidation factor of painting realistic skies can be a barrier to entry. These brushes serve as an educational aid, allowing new users to study how light interacts with form by manipulating pre-made shapes. Educators can use them to demonstrate atmospheric perspective quickly, helping students grasp complex concepts without getting discouraged by technical hurdles. The ease of use ensures that the learning curve remains gentle, encouraging experimentation and play.
Compatibility and File Management
Before diving into the creative possibilities, it is crucial to understand the technical requirements of these digital assets. The Cloud Procreate Brushes are designed exclusively for the Procreate app. This specificity ensures optimal performance and compatibility with the Apple Pencil’s pressure sensitivity and tilt features. It is important to note that these files are ONLY compatible with the Procreate App. They will not function in Photoshop, Clip Studio Paint, or other digital art software. This limitation is due to the proprietary .brushset format used by Procreate, which encapsulates all the settings, textures, and behaviors of the brush in a single package.
When you acquire these tools, you are receiving an instant download in .brushset format. This format is highly efficient, keeping your file library organized. Instead of managing dozens of individual image files or complex preset folders, you receive a single .brushset file that contains the entire collection. This simplicity extends to the installation process, making it accessible even for those who are not technically inclined. The clean structure of the download ensures that there is no clutter, allowing you to get straight to creating.
Step-by-Step Installation Guide
Getting started with your new tools is a straightforward process. The developers have prioritized user experience, ensuring that the transition from purchase to painting is seamless. Follow these steps to import your brushes into Procreate:
- Receive Your Files: After the purchase payment confirmation, you will receive an email with the download link. Check your spam or promotions folder if you do not see it immediately in your primary inbox.
- Download the Files: Click the link provided in the email to download the .brushset file to your iPad. It is recommended to save this file to your "Files" app in a dedicated folder for easy access later.
- Import into Procreate: Open the Procreate app. Tap on the brush icon to open the Brush Library. At the very top of the list, you will see a plus sign (+) or an "Import" button depending on your version. Tap on this area.
- Select the File: Navigate to the location where you saved the .brushset file. Select it, and Procreate will automatically install the entire set into your brush library.
Once imported, you will find the new brushes ready to use. You can organize them further by dragging them into existing brush sets or creating a new custom set specifically for environmental elements. This organizational flexibility allows you to tailor your workspace to your specific project needs.
Creative Applications and Best Practices
To maximize the potential of Cloud Procreate Brushes, consider experimenting with different blending modes. While painting directly on a normal layer works well for opaque clouds, using layers set to "Screen," "Overlay," or "Soft Light" can create ethereal, glowing effects perfect for magical realism or sci-fi backgrounds. Combining these brushes with Procreate’s built-in adjustment tools, such as Gaussian Blur or Motion Blur, can add a sense of movement and wind direction to your skies.
Another effective technique is to use the brushes as a base layer. Paint your general cloud shapes using the stamps, then go back in with a standard soft airbrush to refine edges and add highlights. This hybrid approach combines the speed of stamping with the precision of manual painting, resulting in a unique style that is both efficient and highly detailed. Remember that these tools are meant to enhance your creativity, not replace it. The best results come from using the brushes as a foundation upon which you build your own artistic vision.
In conclusion, incorporating specialized tools like Cloud Procreate Brushes into your digital art practice offers significant advantages in terms of efficiency, quality, and creative flexibility. Whether you are a seasoned professional looking to streamline your workflow or a beginner eager to explore landscape painting, these brushes provide a robust solution for mastering atmospheric effects. With their clean design, ease of use, and seamless integration into the Procreate ecosystem, they represent a valuable addition to any digital artist’s toolkit. By understanding their technical nuances and experimenting with various application techniques, you can elevate your digital landscapes to new heights, capturing the beauty and complexity of the sky with confidence and precision.